


Materials (from left to right)

- Floral shears
- Ribbon (I used ⅝ inch satin ribbon)
- Green floral tape
- Floral wire of choice (I decided to use the silver wire because it’s thicker at 22 gauge while the green wire is 24 gauge)
- Wire cutters
- Scissors
Flowers

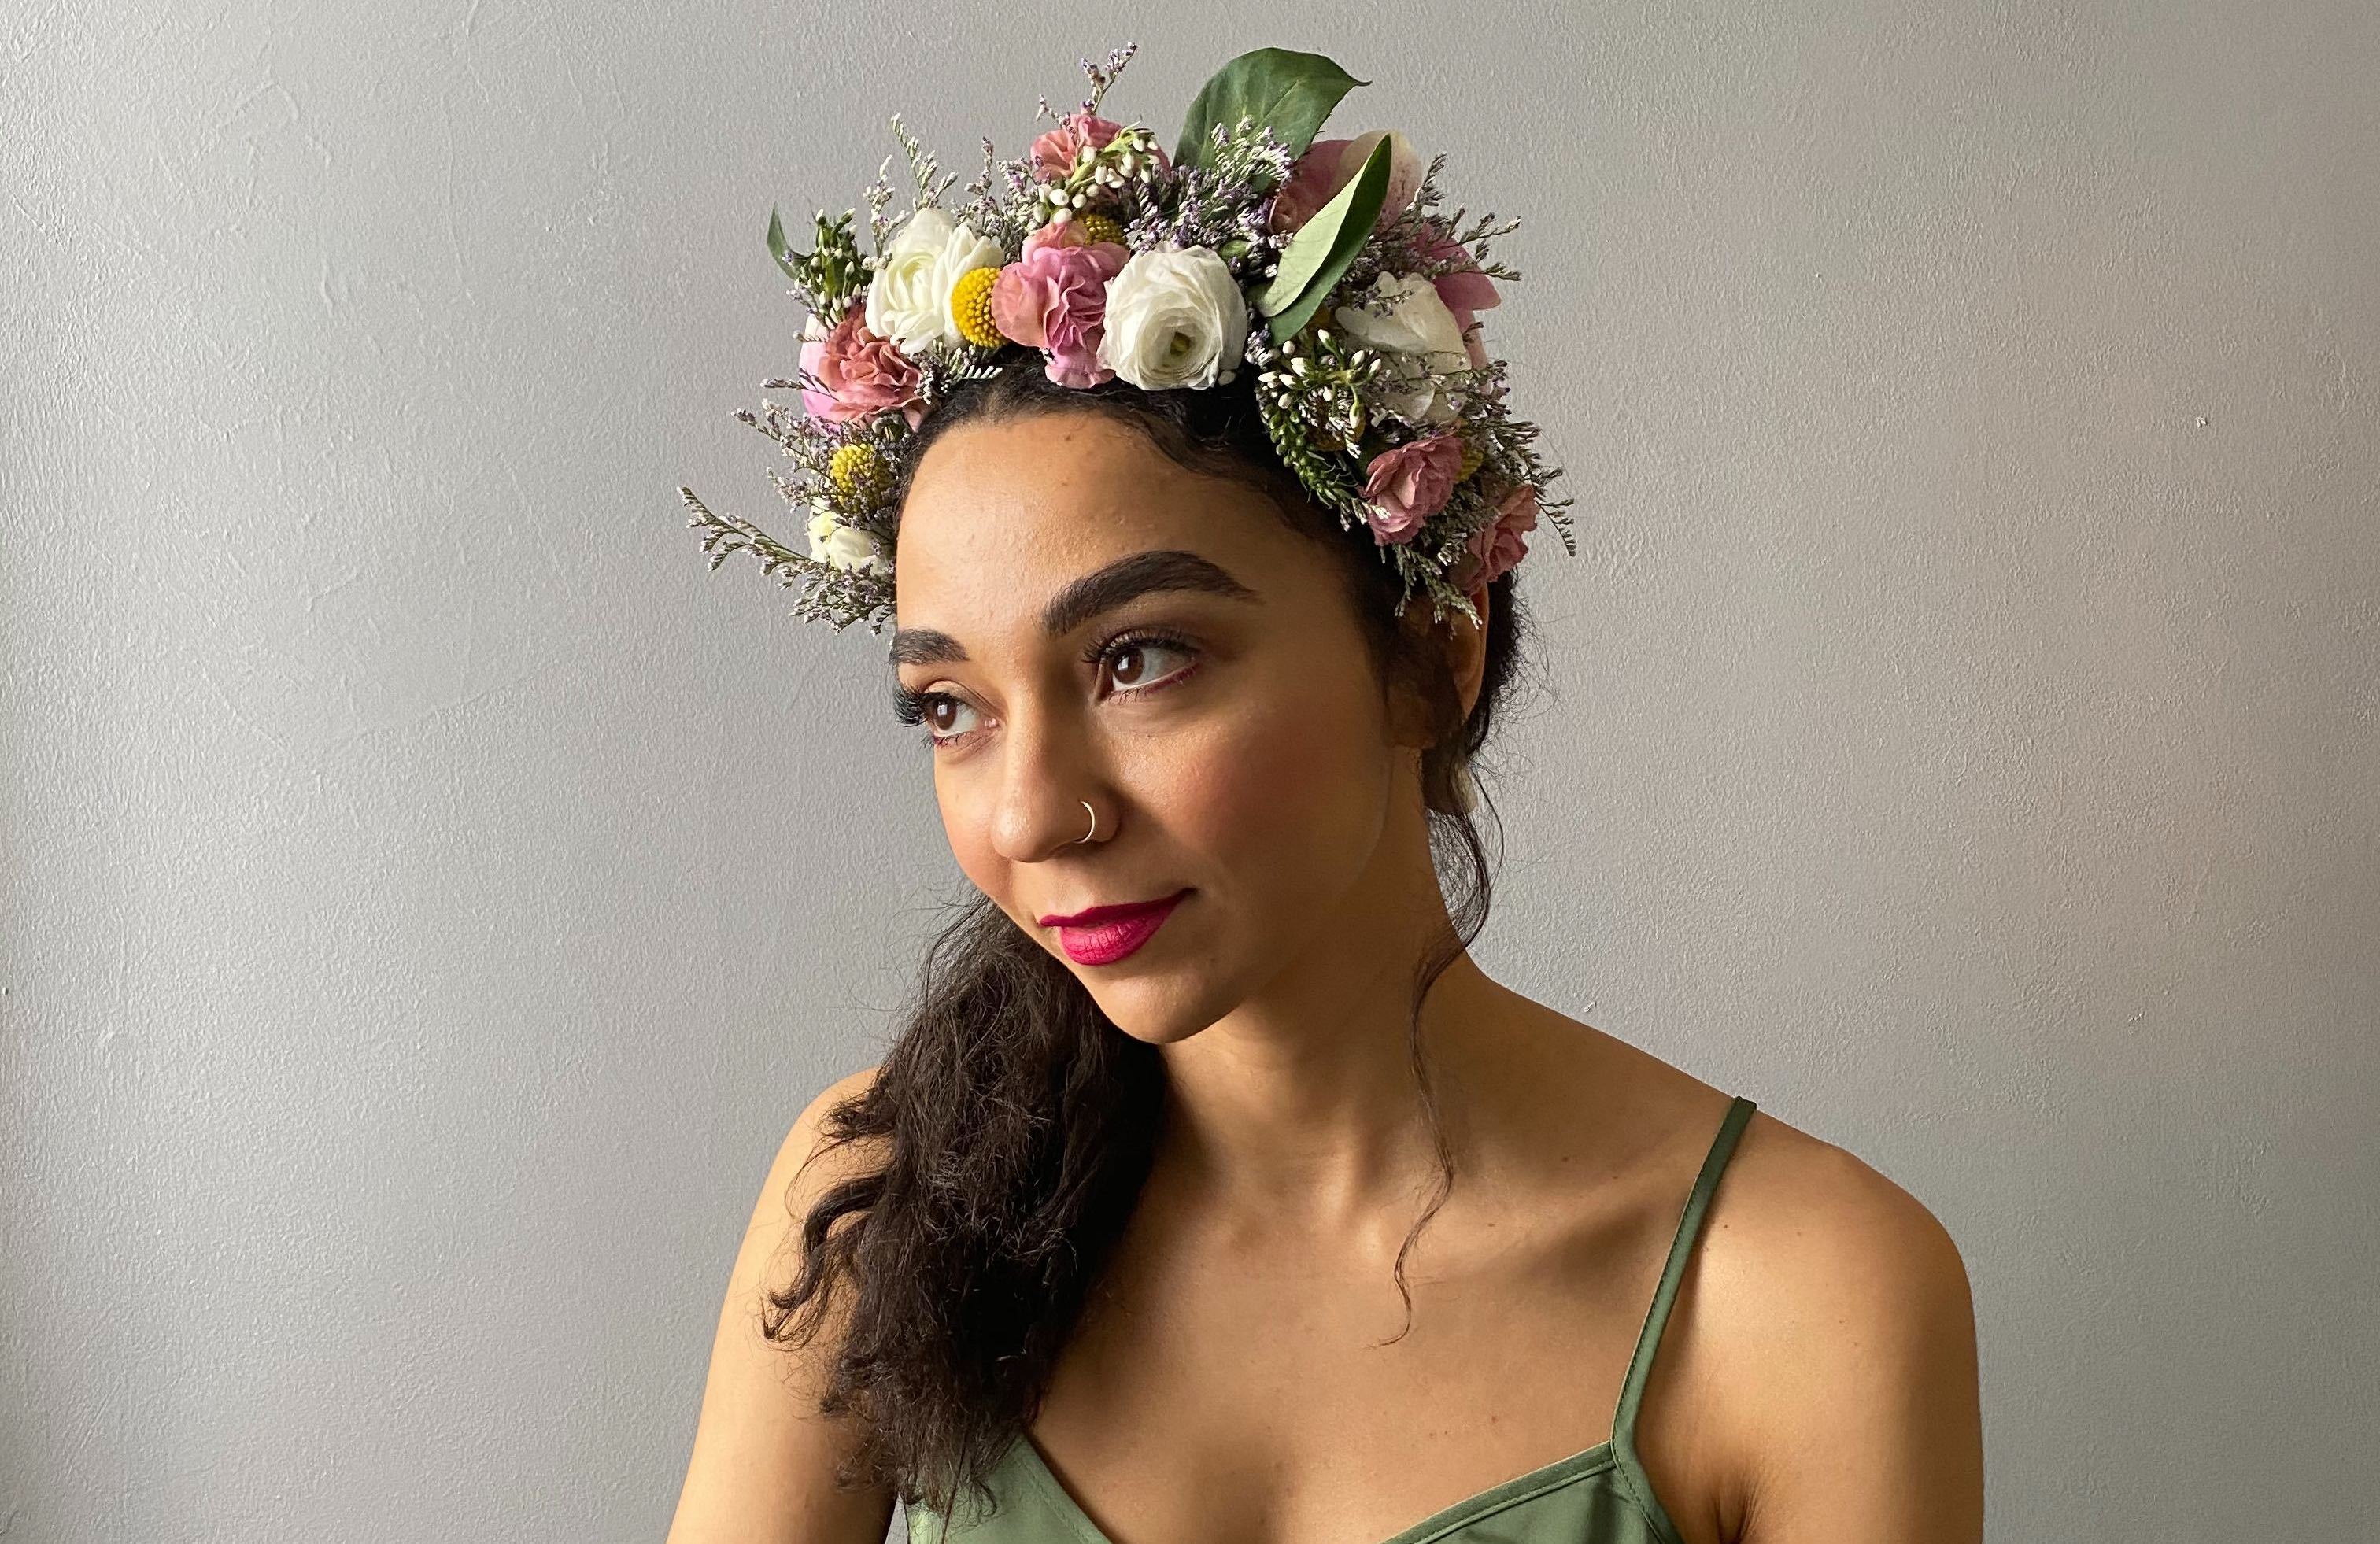
I’m not sure of the exact names of all the flowers I used, but I chose a variety based on their color. As a rule of thumb, choose one or two statement flowers, bushy “fillers” like baby’s breath, some of neutral color, one that’s a bit abstract and playful (I went with that little yellow guy lol), and also pop in some inexpensive flowers like carnations to fill out your crown further and keep costs down. It’s also ideal to add some type of greenery to the cluster! I found most of these flowers from my local grocery store so no need to make a special trip to the florist.
Pro Tip: Pre-cut all of your flowers so that they have about a one inch stem. This will save you a lot of time when you’re constructing your crown!
Step 1

Cut a piece of wire the circumference of your head and wrap floral tape around it evenly.
Step 2

Leaving about 1 to 1.5 inches from each end, begin gathering a few of your cut flowers and lay them on top of the wire, making sure to tightly wrap to secure them.
Pro Tip: Try not to pull the floral tape too hard and rip it! The tension holds better when the floral tape is one long piece.
Step 3

Figure out your pattern! For my crown, I began with pink carnations and then worked my way to the medium-sized, white flowers, then eventually to the large cherry blossom. Then I did the reverse pattern until I got to the second cherry blossom. But at the end of the day, there are NO rules for creativity so just do your thing 🙂
Pro Tip: If you need to take a break, use a small clip to hold tension over the flowers you’ve already wrapped with floral tape. I used these.
Step 4

Once you get your crown to your desired fullness and shape, you’re ready to tie it off! To do so, simply bend the ends to create a loop and be sure to wrap floral tape to hold it together.
Pro Tip: Before tying off your crown, place it on your head from time to time to gauge balance and design.
Step 5

Keep customizing! I decided to add ribbon to give my crown a better fit. No need to tie or knot your ribbon, just string it onto the ends.
Step 6

You’re all set! Your crown is finished and ready to be worn.
Faith Findings
- Try using flowers with bulbs that are barely open. A warm environment will cause your flowers to open dramatically while you’re constructing your crown. Unfortunately, some of my flowers opened up way too much and got super floppy!
- When storing your crown, mist the top of the flowers with water from a spray bottle and place inside a plastic ziplock bag or create a “house” with clear saran wrap and place in your refrigerator. This creates a “greenhouse” for the flowers to live in and they’ll be able to last 1-3 days.
- If you want your crown to last forever, feel free to use dried, faux or silk flowers in place of fresh ones!
Shop our limited edition Spring fragrance: Prelude


Comments [0]